D-Lev Model P3, Serial Number 0002
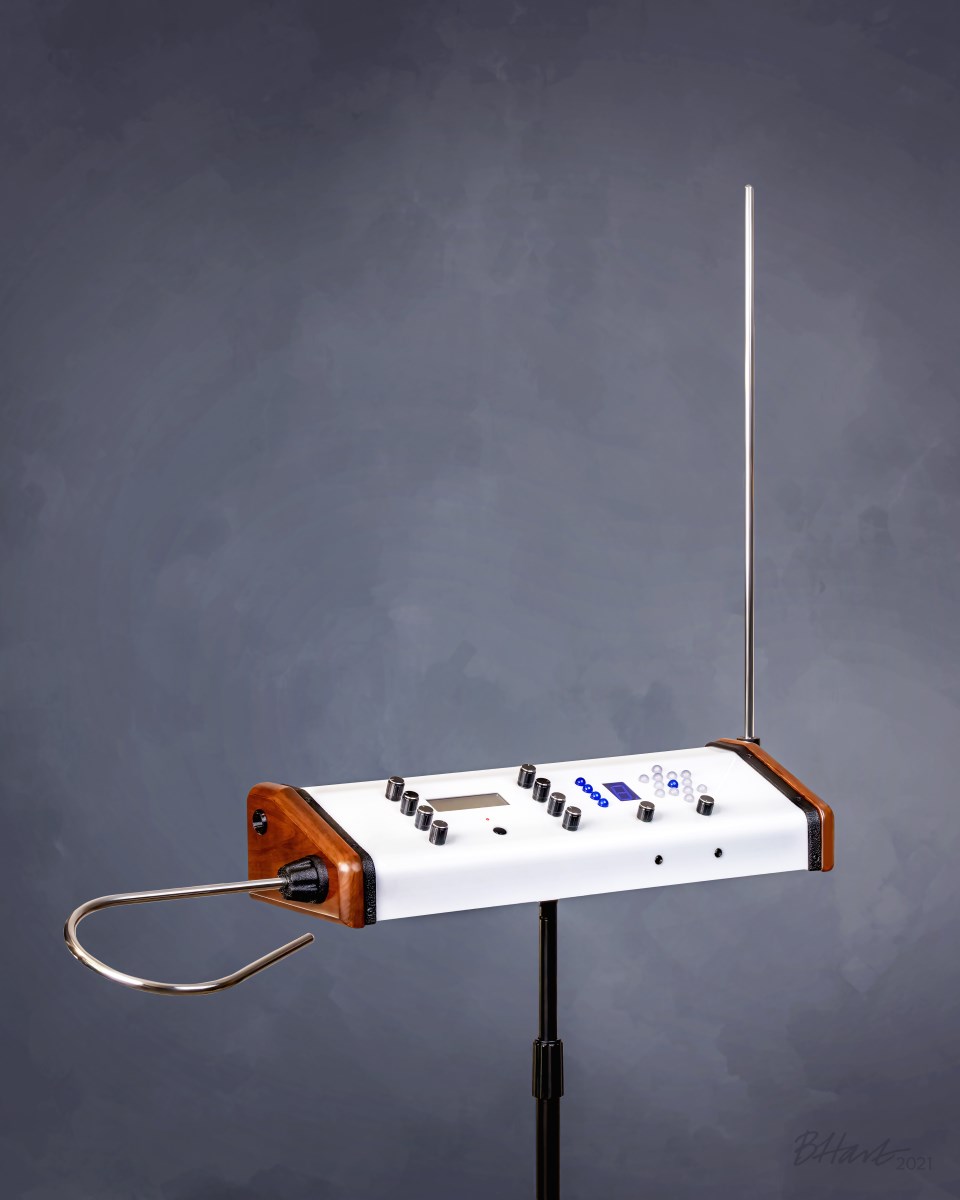
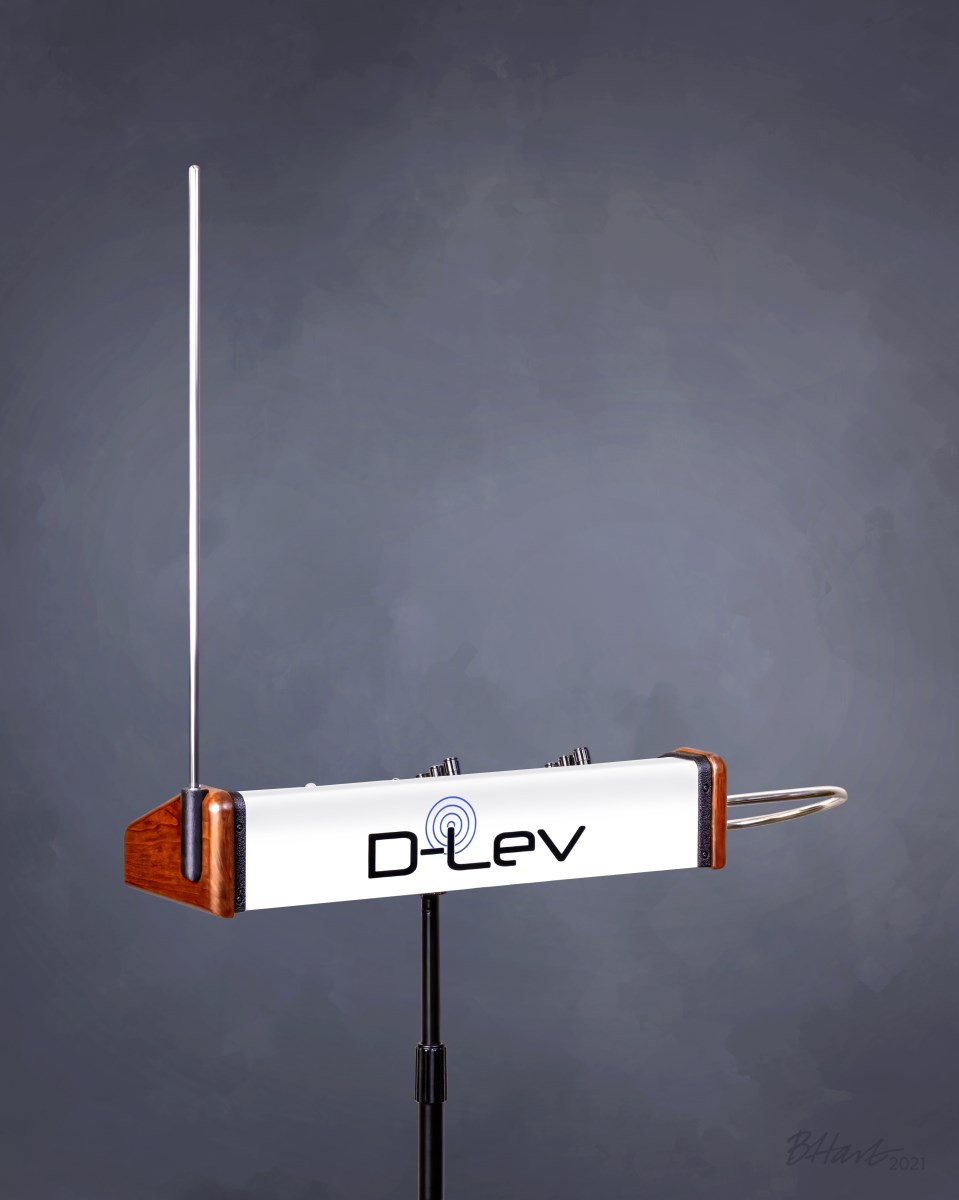


This model lacks the traditional volume loop antenna on the left side, instead using a plate of metal on the end of the cabinet (not visible here).
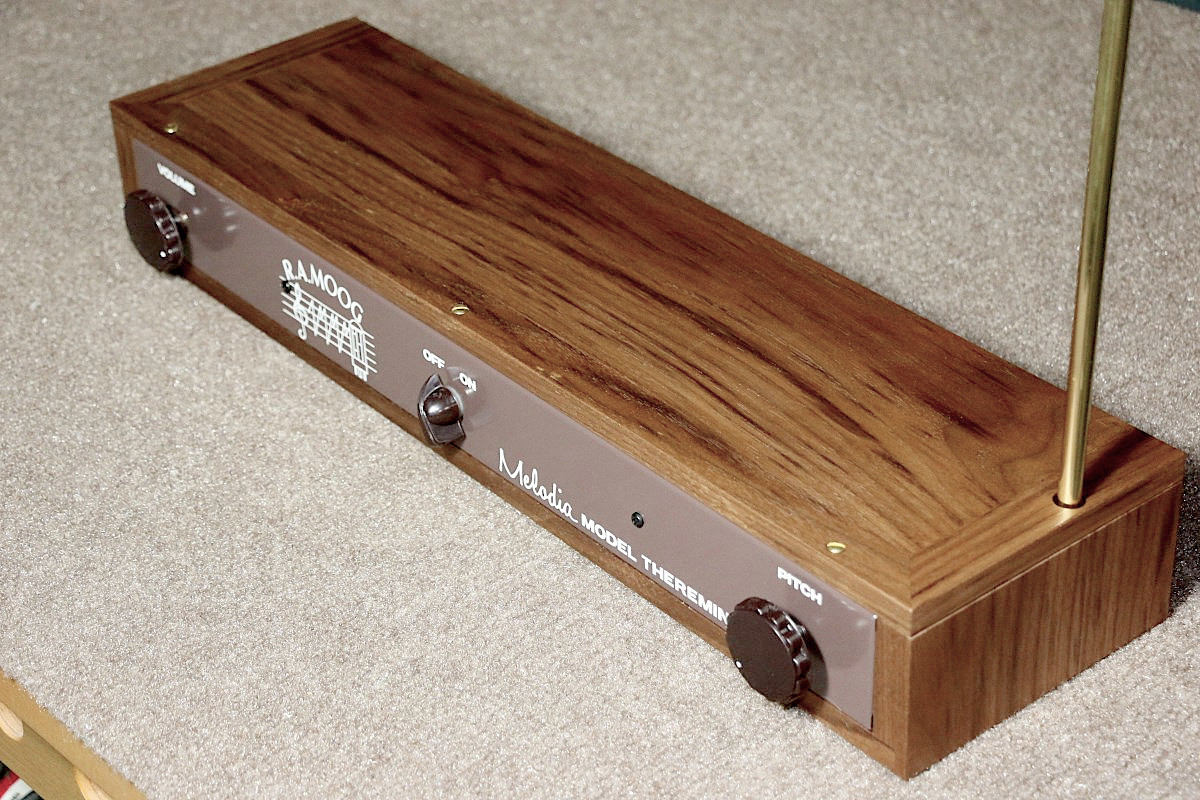
I don’t know why I became fascinated with the Moog Melodia enough to want to build a reproduction. The physical appearance is very basic, and it has no timbre control, so you’re stuck with a single voice. Part of the motivation for the project is that I enjoy doing restorations and have a great appreciation for the craftsmanship of antique and vintage items. I also enjoy building from scratch, especially if the project has a nice mix of woodwork, metalwork, and electronics. With the Moog Melodia I get all of these. I had no expectation going in that this was going to be a great theremin, but in the end it turned out to be better than expected, and it was fun to try to build something different.
I think the fact that the Melodia is well-documented helped to keep the scope of the project down to something that I was willing to do alongside other projects that are also competing for time.… Read the rest
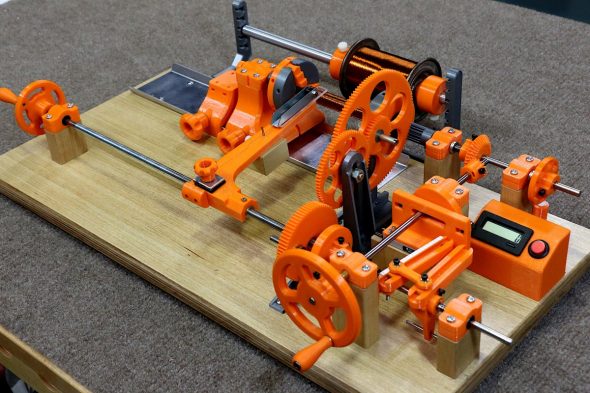
The mostly-completed progressive/universal coil winder. The universal portion is my adaptation of Morris Coilmaster design with some added features. The progressive feature is new. All parts were designed in Fusion360 with the exception of the very nice 3-jaw chucks posted by user “mdkendall” on Thingiverse.com (link in text below).
A few years ago I became fascinated (obsessed) with theremins to the point that I’ve ignored maintenance of this website and I’m pretty sure I can’t even play guitar anymore. The theremin is a miserably difficult instrument to play, but in the early morning hours when no one else can hear me I find a deep satisfaction in playing a musical instrument that almost seems to be connected directly to my brain. If you can think of a melody you can play it (how well you can play it is another matter).
It’s strange that I resisted the theremin for so long in my younger years. It is a natural fit in that it is an electronic instrument that uses radio frequencies and oscillators and filters, all stuff that I’ve been into since my pre-teen years. The theremin story is for another time, though. This project, a coil winder that allows one to make high-frequency coils with winding patterns that are impossible to do by hand, is actually a side task for a theremin construction project that I’ve managed to stretch out for over a year now. … Read the rest
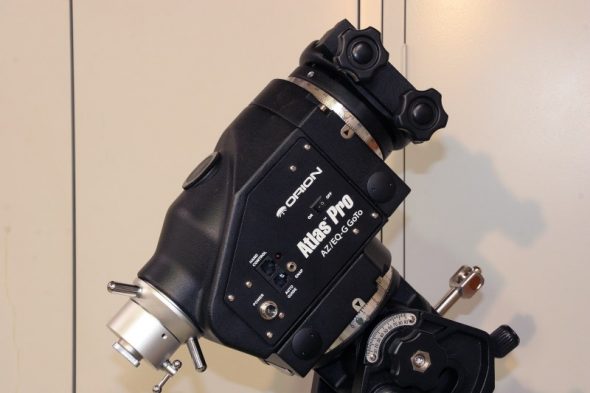
The Atlas AZ-EQG mount is a popular and affordable dual-mode ALT/AZ and equatorial go-to mount manufactured in China for the Taiwanese company Synta and distributed in the US by Orion Telescopes and Binoculars. A nearly identical model (in white instead of black) is distributed (outside the US, for now) under the SkyWatcher name and goes by the AZ-EQ6 model number. Another Synta model that is even more popular in the US is the Atlas EQG, an equatorial-only model that is also sold in the US and worldwide as the Skywatcher EQ6.
The wider popularity of the basic EQG and EQ6 models has resulted in a good amount of user information being shared in the astronomy community, including some well documented disassembly and tuning procedures. The information on the AZ models is a little less plentiful, so I thought it would be helpful to document some of the steps that I went through while cleaning, lubricating, and tuning my mount recently.
While the basic and the AZ- mounts have many similarities in size and weight capacity, they are quite different in their construction and the disassembly procedures for one model aren’t particularly helpful for the other. In searching through the forums I was able to find some disassembly pictures and information that was helpful to get me started, and I hopefully I can add some additional photos and insight of my own.… Read the rest
The Optoma HD20 is a fairly popular DLP projector with a 1920 x 1080 native resolution and an attractive price tag. It also seems to be afflicted with an unusual tendency to suddenly develop a diffused dark area (sometimes inaccurately described as a blurry area) that may obscure part or nearly all of the projected image. This sudden darkening may also be accompanied by a strong smell of melting plastic, because as in the case described here, plastic is actually melting and charring.
I had been looking for a full HD projector to use to build a high-resolution 3D printer, and I ran across this unit suffering from the dark spot problem on Craigslist for $100. I was aware that projectors with this problem could be user-repairable, and when I looked at the unit I was able to see enough to determine that the large dark area on the right side was indeed caused by a melted inner lens.
The cause of the dark region on the projected image is an oddly-shaped aspherical plastic lens that is the final element in an optical path that channels light from the reflector lamp on the left front of the unit. … Read the rest
It’s been a busy home-project summer (as in home-maintenance) but there have been a few shop projects that I have not had time to write about. One of these projects was the fabrication of a video camera that could be swapped for the milling cutter and used to precisely place a target under the cutter visually rather than by the numbers.
Sometime last spring I got the urge to buy and perform a CNC conversion on a small Grizzly G0704 milling machine. Before beginning this project I knew there would be a need to machine stepper-motor adapters and other hardware components to a higher degree of precision and accuracy than I routinely care about. And since many of the parts would have to mate with the machine castings, I needed a way to measure dimensions and hole spacings more accurately than by simply using a dial caliper.
Many other DIYers have built spindle cameras (I’m calling this one a mill-cam from here on), and a web search turned up several different approaches. I incorporated many of their ideas into this design and added a few of my own, including the ability to adjust the tilt the vertical axis of the camera.… Read the rest

Sculpting and hand carving are skills that do not come naturally to me. I can visualize, create, and generally comprehend geometric forms, but there are some things that I just cannot see while working on shapes in nature, and this includes human faces and figures.
I do still need to be able to create an acceptable figure or head now and then for automaton or animatronic projects, but unless some skill develops it is destined to be a “rework until good enough” endeavor. I can live with that shortcoming as long as the job can still eventually get done. It does however require the selection and use of sculpting or carving materials that can tolerate a lot of mistakes and rework. The ideal material would be easily hand-moldable yet firm enough to hold shape and detail without fear of damage from the slightest mishandling. It must carve easily, but it should also allow easy addition of material to fill in mistakes.
After trying a few different types of sculpting media (water-based and polymer clays, oil based plasticine, basswood, carvable foam) I decided that carving wax was a material that I could live with.… Read the rest
A Little History
The Instructograph is an early electromechanical playback device used for learning Continental or American Morse code. Several different models were manufactured by the Chicago-based Instructograph Co. from the 1920s all the way into the 1980s. Learning to receive code is generally a more difficult task than learning to send, and this portable device would allow the student to practice code recognition without the aid of an instructor or fellow student.
Reels of oil-impregnated paper tape perforated with dots and dashes were used to actuate a set of electrical contacts that would in turn operate an external railroad-type sounder, a buzzer or oscillator (for tone), or a light for optical communication. The earliest versions of the Instructograph used a wind-up phonograph motor with a variable speed governor to power the rotation of the tape reels.
Other than the mechanical motor, the only other elements in the device consisted of a set of contacts, a battery, and a rheostat to control the current to the sounder or buzzer.
Later versions used a variable speed electric motor for the tape drive, and some actually included an on-board electronic oscillator that would produce an adjustable audio tone.… Read the rest
Sometime in the late 1970s I became fascinated with researching and collecting antique game machines, candy vending machines, and other amusement devices. My interests were at first focused on those machines that I vaguely remembered from rare visits to a penny arcade as a youth in the ’60s, and even then I was drawn to the artistic design and mechanics of the earlier designs with their art deco lines or ornate castings and wood cabinets. It wasn’t until I started locating information and pictures of these early amusement devices that I became more consciously aware that I had personally encountered many of them at fairs, in drug and dime stores, and in the local movie theater lobby.
Even in the ’60s, the penny arcade that traveled with the amusement show for the annual county fair was loaded with machines that dated back into the early ’30s, and possibly even earlier. By the time I developed the bug to start seeking out and collecting items from this era the market for coin-operated collectibles was hot and getting hotter, due in part to west-coast publications and shows that were fueling speculation and driving prices upward.… Read the rest
One downside to the ultra-miniaturization camcorders and other video recording devices is the increased difficulty in holding the camera steady. The earliest camcorders, despite their awful video quality by today’s standards, did from a pure stability standpoint have the inherent advantage of larger size and mass going for them. Resting a heavy camera on the shoulder tames some of the worst jitters, but palm-sized cameras simply aren’t large enough in any axis to stabilize against the body.
Using even the simplest video stabilizer with a camcorder can result in a large improvement in picture stability. Optical and digital stabilization in camcorders can only fix a limited amount of camera mishandling – it pays to have a stable platform to start with. Learning to balance and operate a stabilizer effectively will take a fair amount of practice, but even if your movements do initially wallow around a bit when tilting and panning, the worst jitters will be gone almost from the moment you start using it.
I probably shouldn’t start off trying to explain physics behind video stabilizers – it’s a topic that is well-covered elsewhere, and you may want to skip this beginning part if you are more interested in the project.… Read the rest
Resistance Soldering
Resistance soldering is a process by which objects to be soldered together are heated by passing a current through them rather than by applying heat from an external source. Localized heating is caused by relatively high current passing through the resistance of the junction. As long as the heating rate of the junction exceeds the thermal dissipation rate, the temperature will rise high enough for solder to melt and flow.
There can be several advantages to using resistance soldering for certain applications, but two big ones stand out:
Thousands of amateurs have built and flown their own airplanes since the beginning of manned flight, in a time before flying machines were even called airplanes. Plans for a bi-wing glider were found in a 1913 copy of The Boy Mechanic, fully described in a page and a half of text and one drawing. In the early 1930s a series of magazine articles covered the construction of a Pietenpol Air Camper, a high-wing monoplane built of wood and powered by a Model A engine. In the 1960s or early ’70s Popular Mechanics magazine published a set of plans for the Volksplane, a wonderfully simplistic and boxy airplane powered by an air-cooled Volkswagen engine.
Plans-built aircraft are still plentiful, but kit-built aircraft, where many of the sub-assemblies are supplied factory-made have increased in popularity. As long as the builder performs more than half of the overall construction effort the aircraft can still be considered amateur-built, operating with a special airworthiness certificate in the experimental category. The freedom to innovate designs destined for this experimental category – without the constraints of type certification – has resulted in a large number of amateur-built aircraft that exceed the performance, efficiency, and in many cases the beauty of production aircraft.… Read the rest