Review: SJK-1 Digital Wax Carving Pencil
Inexpensive Dual-Handle Unit With Independent Temperature Controls
This is Just One of Several Types of Inexpensive Wax Carvers Available on eBay
After experimenting around with a few different sculpting mediums, wax seems to be a material that I might be able to do something with. Subtractive sculpting in wood requires too much vision, training, or talent – none of which I have. Clays allow addition of material to fill in mistakes, but I haven’t had much luck obtaining a finish suitable for producing a final mold from which I can cast multiple pieces.
But wax is different. Some of the harder varieties of sculpting wax can be carved and polished to a very high finish and are durable enough to easily make it through the process of mold-making. The ability to build up or repair wax fairly quickly makes it attractive for experienced sculptors as well as those of us that have to repeatedly add or subtract material until whatever we are making looks right.
It took about five minutes of using an alcohol lamp to heat tools and melt wax to realize that an electric wax pencil would be a necessity. And since I didn’t know much about what I needed or whether I would stick with carving, I looked for something that didn’t cost several hundred dollars.
Wax carvers are plentiful on eBay, and the product described here seems to be available from multiple sources. There are slightly different versions available in different packages, but they seem to have the same general characteristics – dual pencils, digital display, and a variety of pointed and spoon tips. Current prices (as of late 2013) are around $50 – $60 including shipping from China.
At the time when I was initially looking for a wax carver I was never able to find any substantive discussion of this particular product on the sculpting forums. I am still a neophyte carver, but now that I have used a couple of these for nearly two years I can offer some comments on their value and functionality.
What You Get
I have no aversion to products of Chinese manufacture, and I have many in my shop. But like a box of chocolates, you never know what you are getting, and this product is no exception.
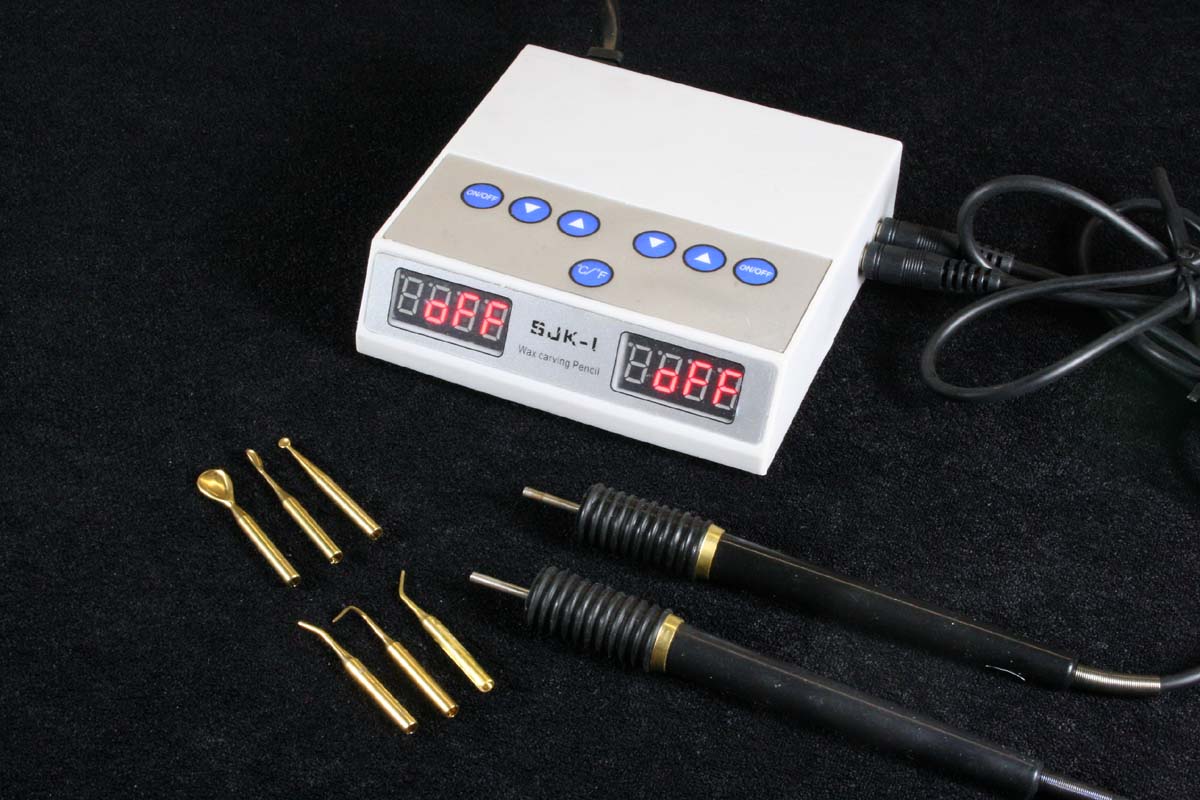
The set comes with the power unit, two pencil handles, a variety of brass tips, two handle rests, and the AC adapter. Of the two units that I now have, both arrived looking like this:
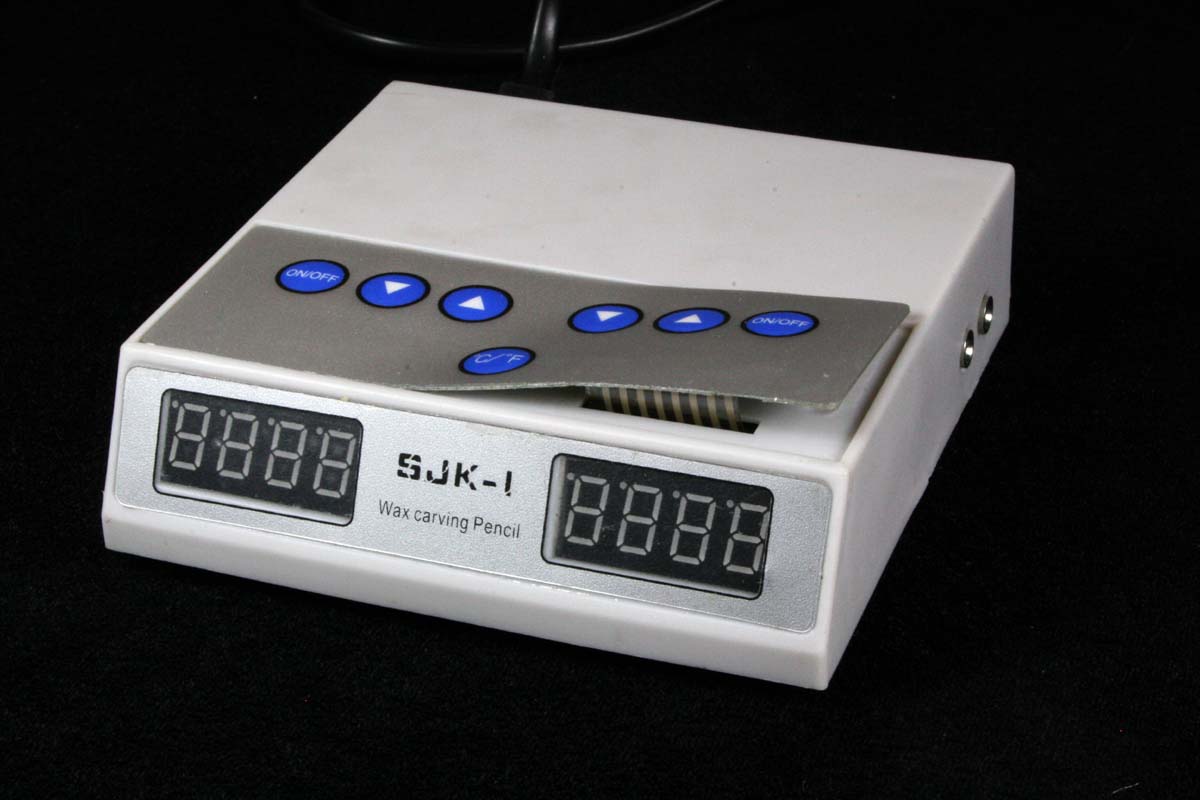
The Adhesive Under the Membrane Button Pad Can Yield Over Time
The flex tape connecting the button pad to the circuit board is stiff enough (or the adhesive weak enough) to lift the membrane off the case. Usually pressing it back in place firmly will take care of this permanently, although a little warming with a heat gun might help.
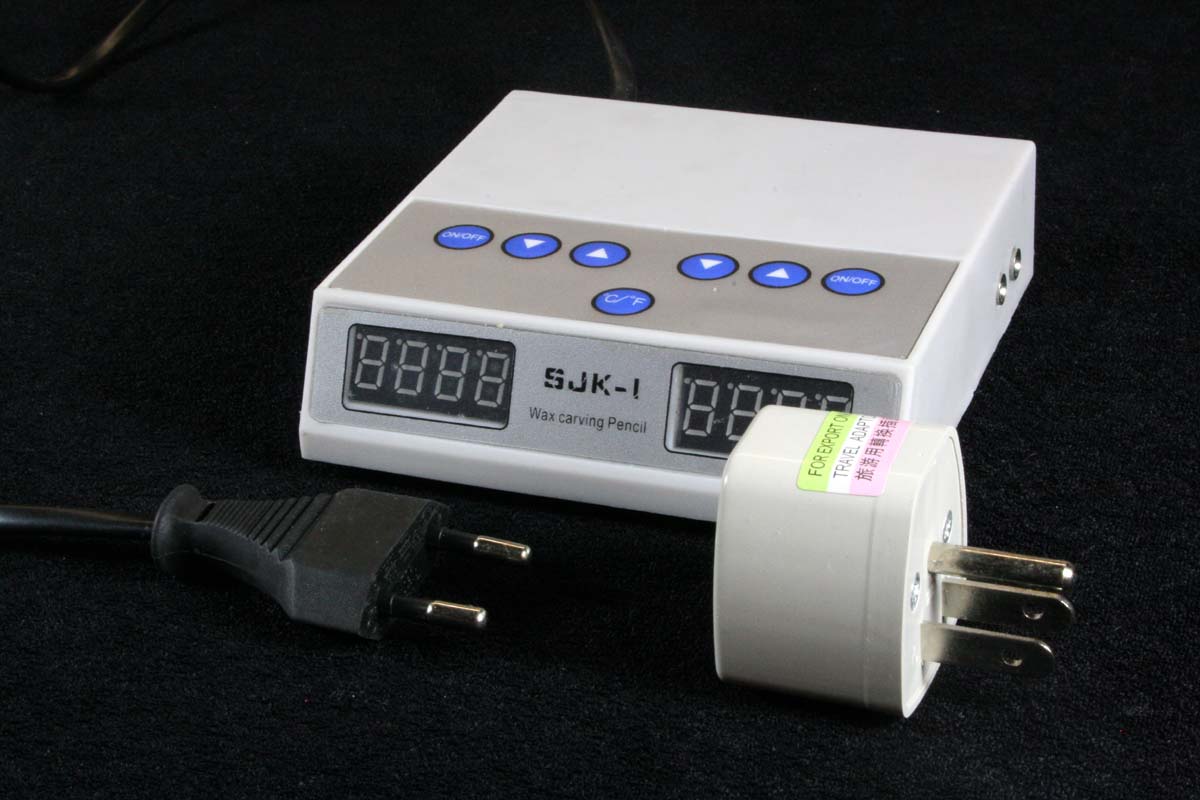
This is the Supplied Europlug and Adapter. You Can Replace the Plug if Desired
The unit operates over a wide voltage range and comes with a European power plug and an adapter for 110V. The combination is a little on the bulky side, but you can cut off the Europlug and replace it with a NEMA plug for US use. The easiest type to use is the piercing kind that requires no stripping – just cut the wire off and clamp the plug on.
The handles are actually pretty nice. The leads are surprisingly soft and flexible, and the gripping handles are hollow to allow air insulation between your fingers and the heating element. The heating element is rigidly potted into the handle past the grip point, and construction here can be inconsistent. On some handles the heating elements are installed crooked, and they cannot be straightened; this is more of a cosmetic defect but it does put the tip of your pencil a little off-axis. Spare pencil handles can be purchased separately on eBay for around $7 shipped.
The brass tips that come with the kit can be inconsistent too, although all were usable. The quality of the fit over the handle’s heating element can vary, and they appear to be hand-slitted at the expansion sleeve. Custom tips of this style are quite easy to make if you have a small lathe. Buy some brass rod of the correct diameter and bore one end to a diameter slightly under the heating element diameter. Either hammer the other end into a shape or sand it down. Annealing the end with a torch will allow you to hammer it into a large paddle or spoon if desired. Sand and polish the final tip, and then use a thin saw blade in a Dremel or Foredom tool to slit the wall of the bored end – this will give it the ability to expand when pressed on the element.
The metal handle stands were not particularly useful – the pencil handles are so light that the cord tends to pull them off. I made a wood block stand as shown, which is much handier for resting up to four pencils in a more natural grabbing position.

Holes Are Bored All the Way Through the Wood Block
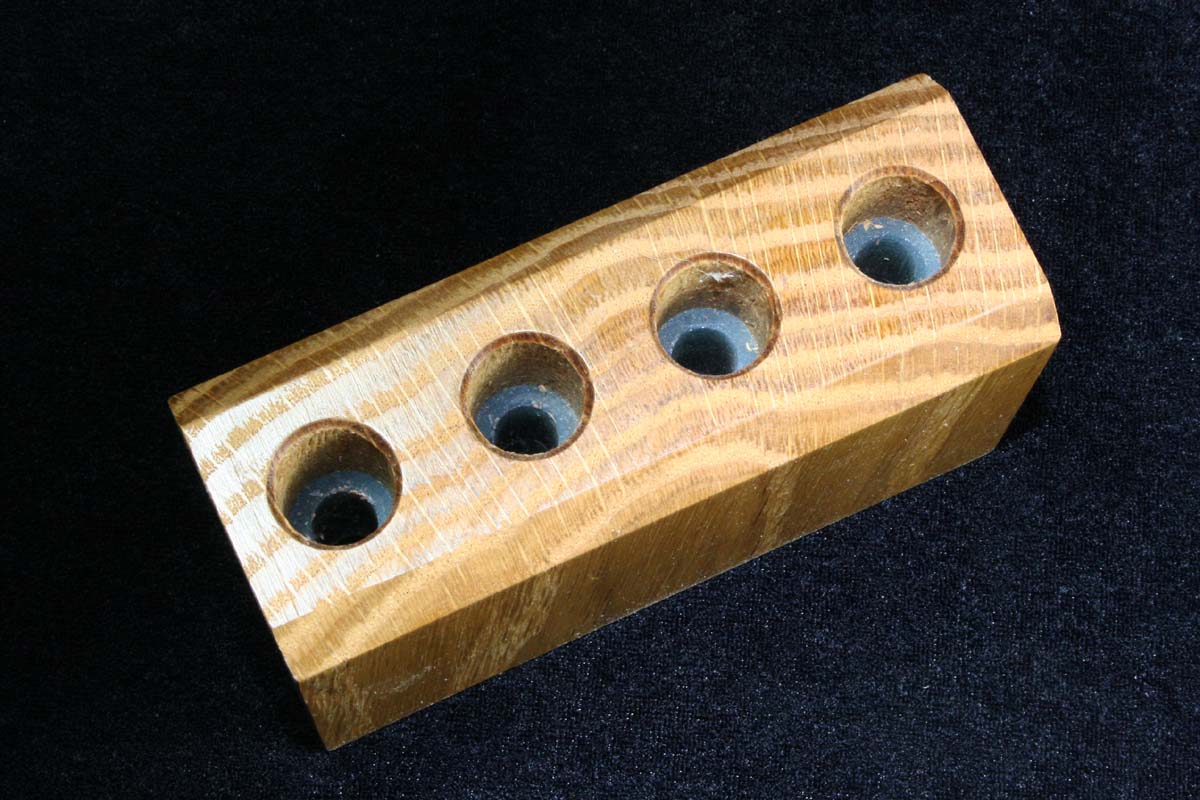
And Short Silicone Tubes are Pressed In to Support Pencils Without Touching Heated Tips
While the digital temperature displays give a convenient means of setting the temperature, they do not give accurate readings. They should be used in the same way that you might use a simple 0-10 scaled dial – you can use the number to return to a favorite known setting, but don’t expect it to indicate the true tip temperature.
The temperature control is open loop, meaning that there is no feedback to regulate the temperature to a particular setting under differing thermal loads. The heating elements in the handles are simple two-terminal devices, and there is no thermostat or temperature sensor. Changing a temperature setting changes the average voltage applied to the respective handle. If a larger and thicker tip (such as the large spoon) is used, the tip will run at a higher temperature than if one of the fine pointed tips is used, even in air. Under load – when the tip is in contact with solid wax – the more massive tips will conduct heat better, but the fine tips will be less effective and may require bumping the display temperature up a few clicks.
I connected a thermocouple first directly to the heating element and then to a thin carving tip to measure the actual tip temperature versus the display settings for several different set temperatures. The actual temperature at the heating element was always considerably higher the display setting, The measured temperature at the end of a brass carving tip was still high, but this again depends on the load and the conductivity of the tip. Don’t be fooled by the close match between the measured temperature and display setting in the rightmost image below; the heavy spoon tip would show a much higher reading.
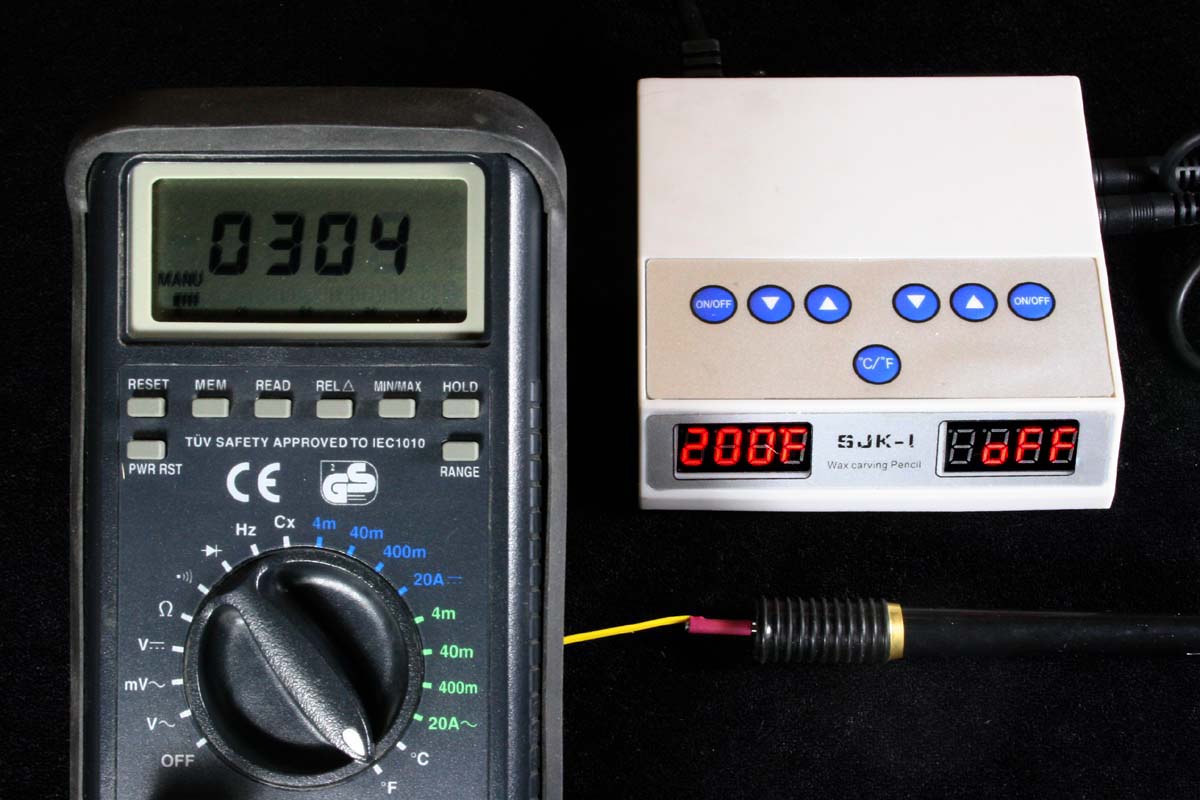
Heating Element Temperature More Than 100F Degrees Above Setting
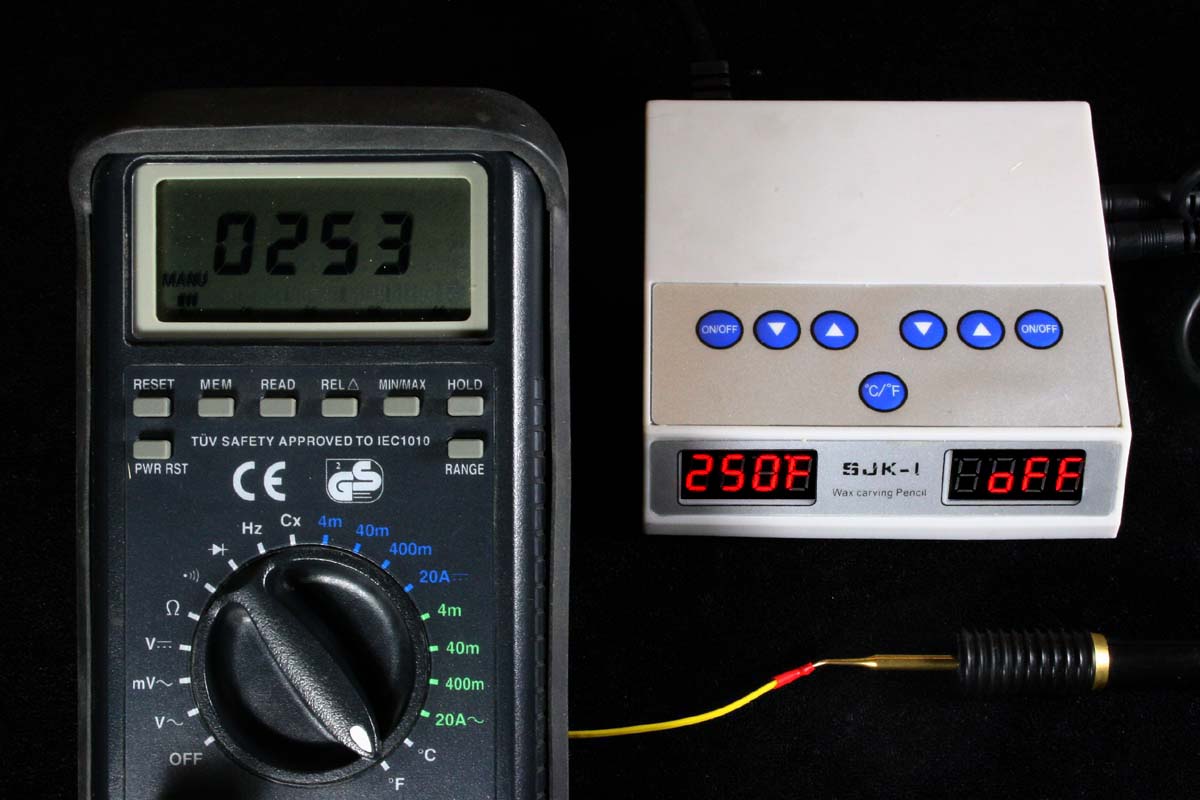
Carving Tip Temperature is Better Here, But a Thicker Tip Would Be Much Hotter
I did not expect the temperature to be regulated at the tip, nor do I feel that it is really necessary. Once you learn the displayed temperature settings that work with the most frequently used tips, the settings are repeatable whether they are accurate or not.

Pre-Warmed Wax in a Cup Spoons Faster Than Cold Wax
However, the low wattage of the heating element and lack of regulation makes it worthwhile to keep a cup of warmed wax nearby if you are adding wax to your sculpture. I keep a copper end cap (used in plumbing) filled with wax on a standard cup warmer plugged into a lamp dimmer control. The wax is kept at its solidus temperature so that the mixture won’t separate, and yet it is ready to be scooped quickly when needed. Any small container will work, although it is helpful if it is heavy enough to stay put when scooping out a chunk of slushy wax.
What’s Inside
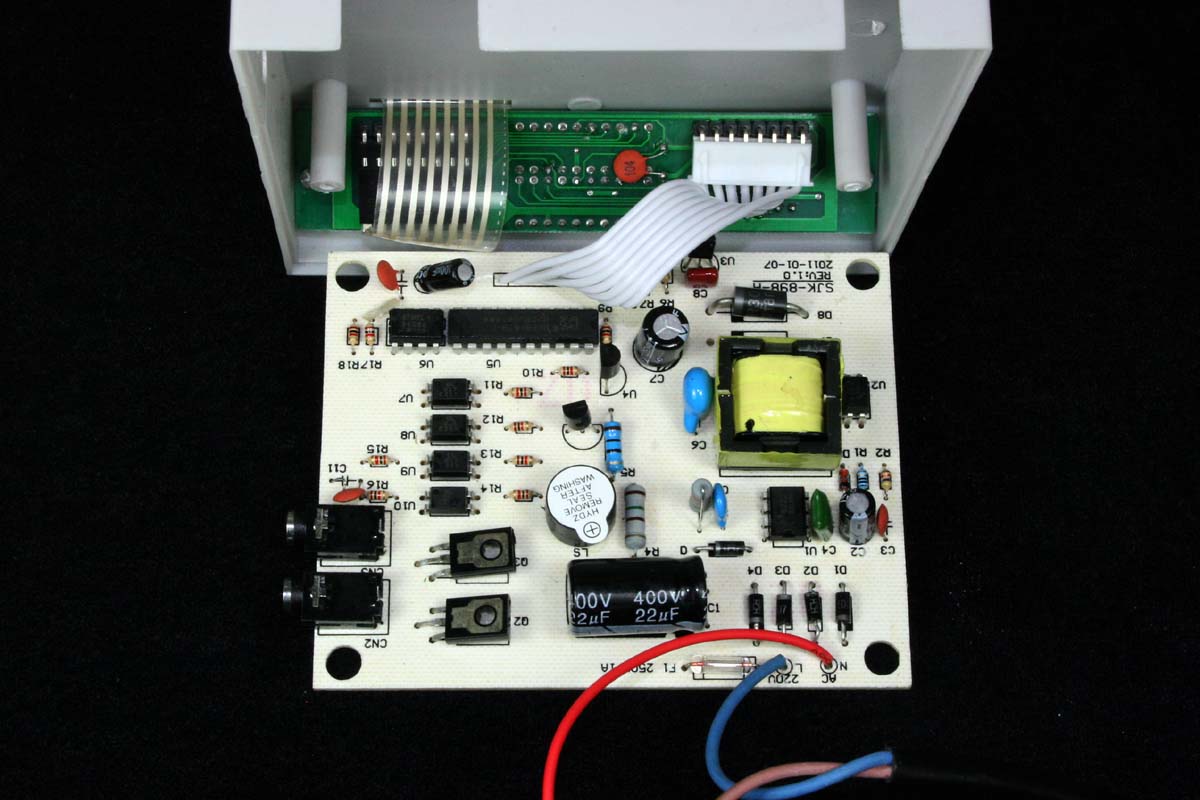
The Main Circuit Board, With Flex Tapes Leading to Front Display and Top Keypad
I always have to look inside stuff – you don’t own it until you’ve taken it apart.
The circuit board itself is basic low quality substrate, but at least it does appear to be a refined production design with no real evidence of hacks or tweaking to make it work as is often the case.
The circuit board is protected with a 1 amp solder-in axial-lead fuse. The power supply is a switching-mode type and operates over US and European voltage ranges.
The output to the pencil heaters is pulsed on at approximately a 4 Hz rate. Every 250ms the output voltage goes high for a duration dependent on the display setting – a higher temperature setting yields a longer duration ON pulse. This is basic duty-cycle control of the average voltage supplied to the heater, and the thermal time constant of the heater is much slower than even this very slow pulse rate.
I also confirmed that there was no temperature regulation by monitoring the pulse width as a heater was plunged into cold water – the pulse width stayed constant.
Summary
The model shown here was a bargain at $65 a couple of years ago, and now this same model or a newer version with a different case is available for $49 shipped. I have had very good luck with the two units that I use, and consider the convenience-for-the-cost to represent a high value. An experienced wax sculptor may have more discerning tastes and disagree with this assessment. Fortunately the low price can make it hard to pass up if you just want to test the waters using an electrically heated wax pencil.
A few final words of warning: this product has no evidence of having undergone any safety or RF emissions testing – there are no CE, UL/CSA, or any other international markings that would indicate regulatory compliance. Buy and use at your own risk.
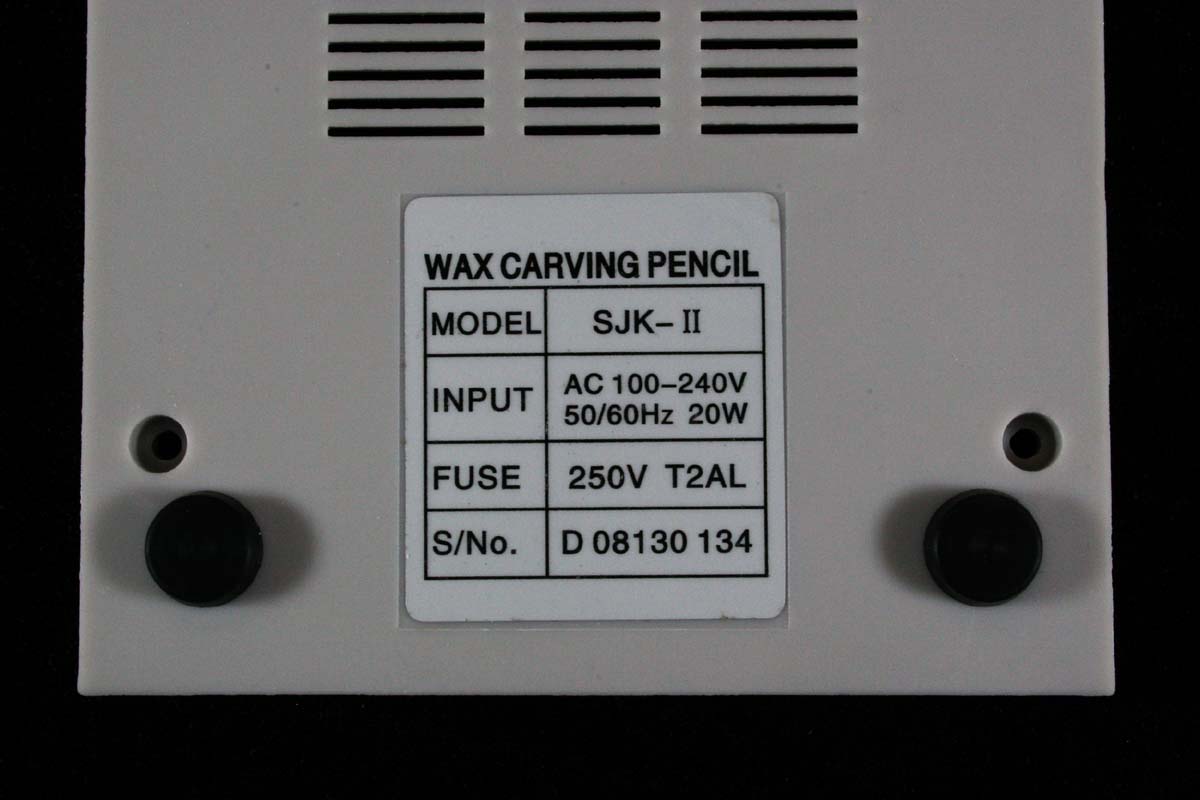
There Are No Safety Certification Labels to Be Found
![]()